


Leave a Reply
You must be logged in to post a comment.
This manual details the iComfort M30, Lennox’s new smart thermostat, compatible with Amazon Echo devices, offering homeowners convenient voice control and energy efficiency․
The Lennox iComfort M30 thermostat represents a significant addition to the Lennox line of smart home solutions, specifically designed with both homebuilders and homeowners in mind․ As an entry-level smart thermostat, the M30 provides a balance of advanced features and affordability, making it an accessible option for upgrading your home’s climate control system․
This thermostat isn’t just about setting temperatures; it’s about creating a comfortable and efficient living environment․ Its key strength lies in its seamless integration with Amazon Alexa, allowing for convenient voice control of your home’s heating and cooling․ The M30 is designed to be smart-home compatible, offering a user-friendly experience and potential energy savings․ This manual will guide you through every step, from initial setup to advanced programming․
Upon opening your Lennox iComfort M30 package, you’ll find several components essential for a successful installation and operation․ The box contains the iComfort M30 thermostat unit itself, the thermostat baseplate designed for wall mounting, and mounting screws with anchors to ensure a secure attachment․
You will also receive a wire label kit, crucial for accurately identifying your existing HVAC wiring during the installation process․ A quick start guide is included to provide a simplified overview of the initial setup․ Finally, a comprehensive installation manual, like this one, offers detailed instructions and troubleshooting tips․ Carefully verify all components are present before beginning the installation to avoid delays․
The Lennox iComfort M30 boasts a range of features designed for comfort, convenience, and energy savings․ Its smart-home compatibility allows seamless integration with Amazon Alexa, enabling voice control of your home’s temperature․ The thermostat learns your preferences and automatically adjusts settings for optimal comfort․
Remote access via the iComfort app provides control from anywhere with an internet connection․ Geofencing capabilities automatically adjust the temperature based on your location, maximizing energy efficiency․ The M30 also offers customizable scheduling, detailed energy reports, and alerts for system maintenance, ensuring long-term performance and cost savings․
Before installing the Lennox iComfort M30, verifying compatibility with your existing HVAC system is crucial․ The M30 is generally designed to work with a wide range of Lennox and non-Lennox systems, including furnaces, air conditioners, and heat pumps․ However, certain older or specialized systems may require an adapter or may not be fully compatible․
Specifically, check for compatibility with millivolt systems and those utilizing proprietary communication protocols․ Consult a qualified HVAC technician if you are unsure about your system’s compatibility․ Proper wiring and configuration are essential for optimal performance and to avoid damaging your HVAC equipment․ A pre-installation assessment is highly recommended․

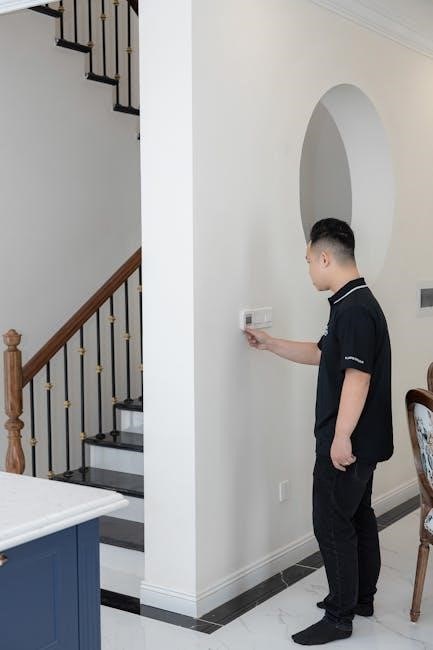
Proper installation ensures optimal performance of your Lennox iComfort M30 thermostat․ Begin by carefully reviewing all safety precautions outlined in this manual․ Before commencing, always disconnect power to your HVAC system at the breaker box․ The installation process involves three key steps: mounting the thermostat base, wiring the thermostat, and powering on for initial configuration․
Ensure the chosen location for the thermostat is level and away from direct sunlight or drafts․ Accurate wiring is paramount; refer to the wiring diagram included in the box and label all wires before disconnecting the old thermostat․ Double-check all connections before restoring power․
Securely mounting the base is the first step in a successful installation․ Begin by removing your existing thermostat from the wall, carefully labeling each wire before disconnection – this is crucial! Use the included mounting template to mark the screw locations on the wall, ensuring a level placement․
Drill pilot holes at the marked locations and insert the provided wall anchors if necessary, especially for drywall installations․ Align the thermostat base with the holes and secure it using the provided screws․ Ensure the base is firmly attached to the wall before proceeding to the wiring stage․ A stable base prevents future issues․
Carefully connect the wires to the corresponding terminals on the M30 base․ Refer to the labeled wiring diagram included with your thermostat and the notes you made during the removal of your old thermostat․ Common terminals include R (power), C (common), W (heat), Y (cool), and G (fan)․
Ensure each wire is securely inserted into its designated terminal – a loose connection can cause malfunctions․ Gently tug on each wire to confirm it’s firmly held․ If you encounter any uncertainty about a wire’s function, consult a qualified HVAC technician․ Incorrect wiring can damage your system!
Once the wiring is complete, restore power to your HVAC system at the breaker․ The M30 thermostat should power on automatically, displaying the Lennox logo and initiating the setup sequence․ You’ll be prompted to select your system type – furnace, heat pump, or air conditioner – and configure basic settings like date, time, and zip code․
Follow the on-screen instructions carefully, as accurate initial configuration is crucial for optimal performance․ The thermostat may also guide you through a system test to verify proper operation of heating and cooling․ Note any error messages and consult the troubleshooting section if needed․
To unlock the smart features of your iComfort M30, connecting to your home’s Wi-Fi network is essential․ From the thermostat’s main menu, navigate to the “Network” or “Wi-Fi” settings․ The thermostat will scan for available networks; select yours from the list and enter your password using the touchscreen keypad․
Ensure your Wi-Fi signal strength is strong at the thermostat’s location․ A successful connection will be indicated by a Wi-Fi icon appearing on the display; If the connection fails, double-check your password and router settings․ Once connected, the thermostat will automatically synchronize with the Lennox cloud servers․
The iComfort app is your remote control for the M30 thermostat, offering convenient access and control from anywhere with an internet connection․ The app’s dashboard provides a clear overview of your current temperature settings, humidity levels, and system status․ From here, you can easily adjust the temperature, change operating modes (heat, cool, auto), and view energy usage reports․
The app also allows for advanced scheduling and geofencing features․ Explore the menu options to customize your comfort and optimize energy savings․ Regular updates ensure the app remains compatible and delivers the best possible user experience․
To begin utilizing the full potential of your Lennox iComfort M30 thermostat, you’ll need to download and install the iComfort app on your smartphone or tablet․ The app is readily available for both iOS and Android devices․ Simply visit the Apple App Store (for iPhones and iPads) or the Google Play Store (for Android phones and tablets)․

Search for “iComfort” within the respective app store and locate the official Lennox Industries app․ Tap the “Install” button and allow the app to download and install on your device; Once installed, open the app to begin the account creation and thermostat pairing process․
After installing the iComfort app, you’ll be prompted to create a Lennox account․ This account will securely store your thermostat settings and allow remote access․ Provide a valid email address and create a strong password․ You may also be asked to verify your email address through a confirmation link sent to your inbox․
Once your account is created, tap the “Add Thermostat” option within the app․ The app will guide you through the process of connecting your M30 to your home’s Wi-Fi network․ Ensure your thermostat is powered on and in pairing mode before proceeding․ Follow the on-screen instructions to complete the setup․

The iComfort app presents a user-friendly interface for controlling your M30 thermostat․ The main dashboard displays the current temperature, setpoint, and operating mode (Heat, Cool, Auto, Off)․ A prominent temperature adjustment slider allows for quick changes․
Tap the “Schedule” icon to access programming options, and the “Menu” icon (typically three horizontal lines) reveals advanced settings․ Here, you can manage geofencing, adjust system settings, and view energy usage reports․ The app also provides access to support resources and troubleshooting guides․ Explore each section to fully understand your thermostat’s capabilities․
The iComfort M30 allows for customized heating and cooling schedules to optimize comfort and energy savings․ Within the app, navigate to the “Schedule” section to create unique programs for each day of the week․ You can set different temperatures for various time blocks – for example, cooler temperatures while you’re away at work and warmer temperatures before you arrive home․
The app supports multiple schedule profiles, allowing you to easily switch between settings for weekdays, weekends, or vacations․ Precise scheduling minimizes energy waste and ensures a comfortable environment tailored to your lifestyle․ Experiment with different settings to find the perfect balance․
To create a custom schedule, open the iComfort app and select the “Schedule” icon․ Choose the day you wish to program, then tap “Add Period․” Input the desired start time and temperature setting for that period․ Repeat this process to add multiple periods throughout the day, reflecting your typical routine․
You can easily copy schedules from one day to another for convenience․ Name your schedules for easy identification (e․g․, “Weekday Morning,” “Weekend Evening”)․ Remember to save your changes after each adjustment․ The M30’s intuitive interface makes schedule creation straightforward, maximizing comfort and minimizing energy consumption․
Geofencing utilizes your smartphone’s location to automatically adjust the thermostat․ Within the iComfort app, enable the geofencing feature and define a virtual “fence” around your home․ When your phone enters the geofence, the thermostat will switch to your “Home” temperature setting, ensuring comfort upon arrival․
Conversely, when you leave the geofence, it will revert to your “Away” setting, saving energy․ You can customize the geofence radius and temperature settings for both scenarios․ Ensure location services are enabled on your phone for accurate geofencing functionality․ This feature provides hands-free climate control, optimizing both comfort and efficiency․
The Lennox iComfort M30 seamlessly integrates with Amazon Alexa, offering convenient voice control of your home’s temperature․ To begin, you must enable the Lennox skill within the Alexa app․ Search for “Lennox” in the Skills & Games section and follow the on-screen instructions to link your Lennox account․
Once linked, you can use voice commands like “Alexa, set the thermostat to 72 degrees” or “Alexa, what is the temperature?” Alexa can also adjust the mode (heat, cool, auto) and fan settings․ Ensure your M30 is connected to Wi-Fi and your Lennox account is active for optimal performance․ Enjoy hands-free comfort control!
To unlock voice control, you must first enable the Lennox skill within the Amazon Alexa app․ Begin by opening the Alexa app on your smartphone or tablet․ Navigate to the “Skills & Games” section, typically found in the menu․
Search for “Lennox” using the search bar․ Select the Lennox skill from the search results․ Click the “Enable to Use” button․ You will then be prompted to link your existing Lennox account to Alexa․ Enter your Lennox account credentials when requested․ Follow any additional on-screen prompts to complete the linking process․ Successful linking confirms Alexa can now communicate with your iComfort M30․
Once the Lennox skill is enabled, controlling your iComfort M30 with voice commands is straightforward․ To adjust the temperature, simply say, “Alexa, set the thermostat to [desired temperature]․” For example, “Alexa, set the thermostat to 72 degrees․”
You can also ask, “Alexa, what is the temperature?” to receive a current reading․ To increase or decrease the temperature, use commands like, “Alexa, increase the thermostat by [number] degrees” or “Alexa, decrease the thermostat by [number] degrees․” Experiment with phrasing; Alexa understands variations․ Ensure clear pronunciation for optimal performance․ Enjoy hands-free comfort control!
The iComfort M30 features a clear, intuitive touchscreen display․ The primary screen showcases the current room temperature prominently, alongside the setpoint temperature․ A mode indicator displays whether the system is in Heat, Cool, Auto, or Off mode;
Swipe gestures navigate through additional information, including outdoor temperature (if connected), humidity levels, and system status․ A fan icon indicates fan operation․ The Wi-Fi signal strength is also visible․ Alerts and notifications appear as banners at the top of the screen․ The display automatically adjusts brightness for optimal visibility in any lighting conditions․
If your M30 isn’t connecting to Wi-Fi, ensure your router is functioning and within range․ Restart both the thermostat and your router․ Double-check the entered Wi-Fi password․ Incorrect temperature readings often stem from thermostat placement – avoid direct sunlight or drafts․ Recalibrate the temperature sensor within the settings menu․
App connectivity problems can be resolved by verifying your internet connection and ensuring the Lennox app is updated․ Force-closing and reopening the app can also help․ If issues persist, try deleting and reinstalling the app․ For further assistance, consult the Lennox support website or contact a qualified HVAC technician․
A common issue is an incorrect Wi-Fi password․ Double-check and re-enter it carefully within the thermostat’s settings․ Ensure your home Wi-Fi network is operating at 2․4 GHz, as the M30 may not support 5 GHz networks․ Verify the thermostat is within range of your router; walls and distance can weaken the signal․
Restarting both the thermostat and your router is a simple yet effective troubleshooting step․ Confirm your router’s firmware is up-to-date․ If problems continue, temporarily disable any firewall settings that might be blocking the connection․ Contact Lennox support if these steps don’t resolve the issue․
Several factors can cause inaccurate temperature displays․ Ensure the thermostat isn’t directly exposed to sunlight, drafts, or heat-generating appliances, as these can skew readings․ Verify the thermostat is level; an uneven installation can affect accuracy․ Check for obstructions blocking airflow around the unit․
Calibrate the temperature setting within the thermostat’s menu if a consistent offset exists․ Compare the thermostat’s reading with a trusted thermometer placed nearby․ If the discrepancy persists, inspect the wiring connections to ensure they are secure․ Contact a qualified HVAC technician if calibration doesn’t correct the problem․
If the iComfort app fails to connect to your M30 thermostat, first confirm your home Wi-Fi network is functioning correctly․ Ensure the thermostat is within range of your router and hasn’t been disconnected from the network․ Restart both the thermostat and your mobile device․ Force close and reopen the iComfort app, then attempt to reconnect․
Verify the app is updated to the latest version․ If issues persist, try deleting and reinstalling the app․ Double-check that you’re using the correct login credentials․ Contact Lennox support if the problem continues, providing details about your network setup and any error messages displayed․
To reset your Lennox M30 thermostat, begin by accessing the settings menu directly on the thermostat’s display․ Navigate to the “Reset” or “Factory Defaults” option – the exact wording may vary․ Confirm your decision to reset, as this will erase all personalized settings, schedules, and Wi-Fi connections․
A complete reset restores the thermostat to its original factory state․ After the reset, you’ll need to re-establish the Wi-Fi connection and reconfigure all your preferences through the iComfort app․ This process is useful for troubleshooting persistent issues or preparing the thermostat for a new user․

Maximize energy savings with your Lennox M30 by utilizing its smart features․ Implement customized scheduling to automatically adjust temperatures based on your daily routine, reducing energy consumption when you’re away or asleep․ Leverage geofencing through the iComfort app; it detects your location and adjusts settings accordingly․
Regularly review energy usage reports within the app to identify patterns and optimize your settings․ Consider utilizing the “Smart Away” feature for extended absences․ Ensure proper insulation and seal air leaks in your home to complement the thermostat’s efficiency․ Small adjustments can yield significant long-term savings!
Keep your Lennox M30 functioning optimally with simple maintenance․ Regularly dust the thermostat faceplate with a soft, dry cloth to ensure clear display visibility․ Avoid using liquids or abrasive cleaners․ Periodically check the wiring connections at the thermostat base, ensuring they remain secure – always power off the HVAC system before doing so․
Update the iComfort app and thermostat firmware when prompted to benefit from the latest features and bug fixes․ Monitor battery levels (if applicable) and replace them as needed․ If you experience persistent issues, consult the troubleshooting section of this manual or contact Lennox support for assistance․
Your Lennox iComfort M30 thermostat is covered by a limited warranty against defects in materials and workmanship․ The standard warranty period is one year from the date of purchase, covering parts and labor․ Extended warranty options may be available; inquire with your installing dealer for details․
This warranty does not cover damage caused by improper installation, misuse, neglect, or unauthorized modifications․ To make a warranty claim, retain your proof of purchase and contact a certified Lennox dealer․ Warranty service must be performed by a qualified technician․ See the full warranty document for complete terms and conditions․
For comprehensive support regarding your Lennox iComfort M30 thermostat, several resources are readily available․ Begin with the official Lennox website, which hosts a dedicated support section with FAQs, troubleshooting guides, and downloadable manuals․ You can also contact Lennox’s customer support team directly via phone or email – details are listed on their website․
Your local Lennox dealer is an invaluable resource for installation assistance, advanced troubleshooting, and warranty claims․ Furthermore, online forums and communities dedicated to HVAC systems often feature discussions and solutions related to the M30․ Explore these platforms for peer-to-peer support and shared experiences․
Prior to installation or maintenance of your Lennox iComfort M30 thermostat, always disconnect power to your HVAC system at the breaker box to prevent electrical shock․ Improper wiring can damage the thermostat and potentially create a fire hazard; consult a qualified HVAC technician if unsure․
Do not attempt to disassemble or repair the thermostat beyond the scope of this manual․ Avoid exposing the thermostat to extreme temperatures, humidity, or direct sunlight․ Keep the device dry and away from flammable materials․ Ensure all wiring connections are secure and properly insulated․ Follow all local electrical codes and regulations during installation․

You must be logged in to post a comment.